IMPORTANT NOTE: Due to the current situation regarding COVID-19, we don’t have access to the MIR100 AGV and have not been able to test the last tweaks to the interface. We have worked hard to ensure the correct functionality of the robotic addons but would much appreciate your patience if any bugs are found.
Vuforia Spatial Robotic Add-on
The vuforia-spatial-robotic-addon contains the hardware interfaces for robotic systems in the Vuforia Spatial Toolbox server. These hardware interfaces allow the connection to external hardware devices such as robots that can be controlled in Augmented Reality, using VST tools.
Currently, our system contains robotic addons for 2 hardware systems:
But it can be adapted to any other robotic system by developing a custom robotic addon.
Platform Architecture
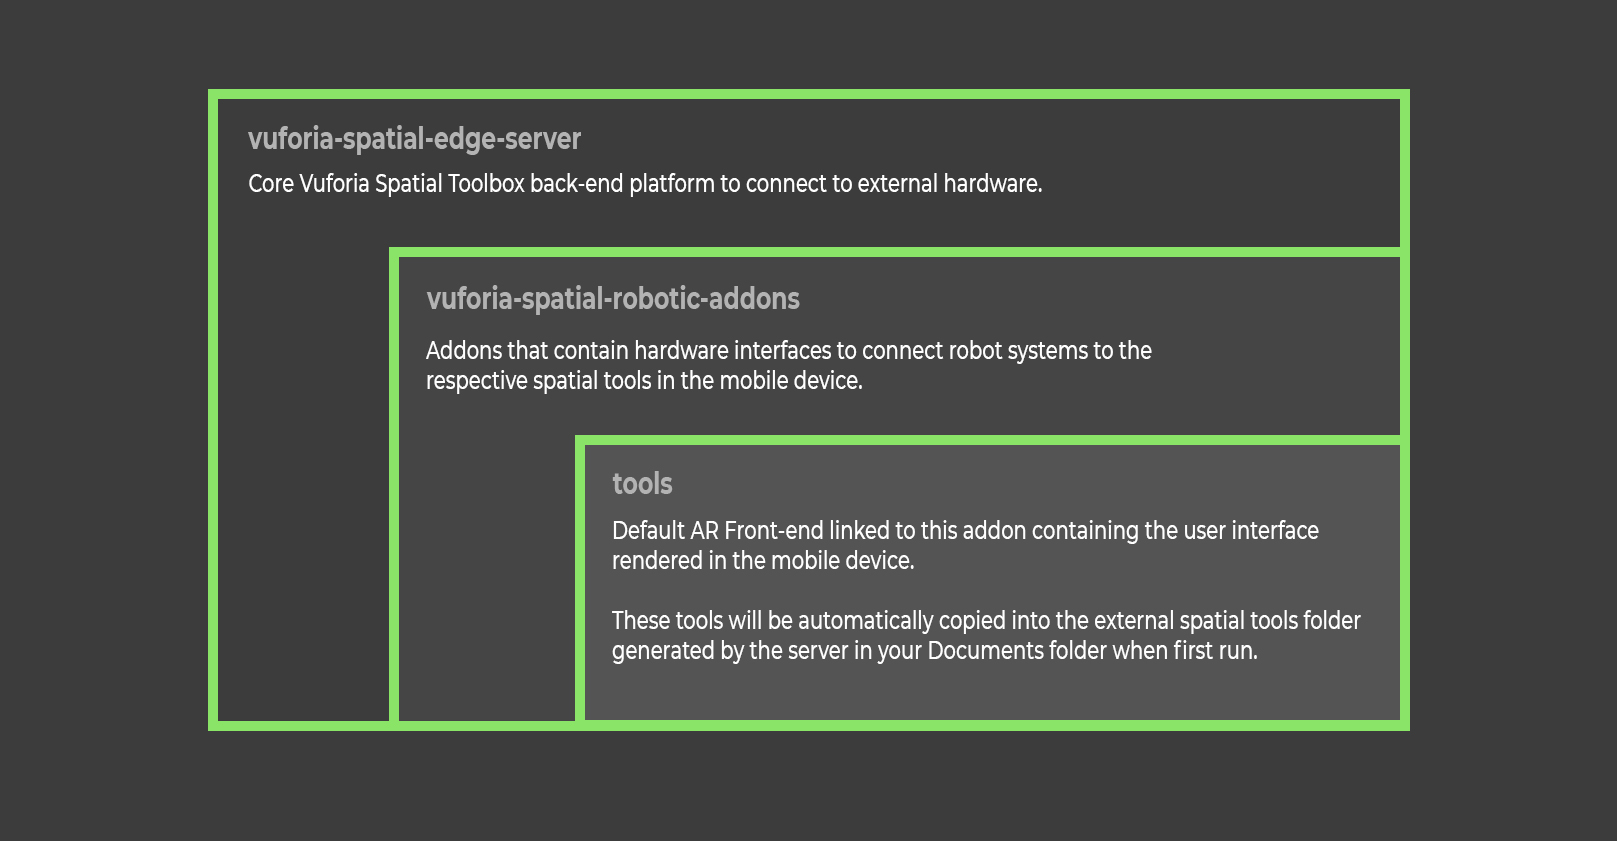
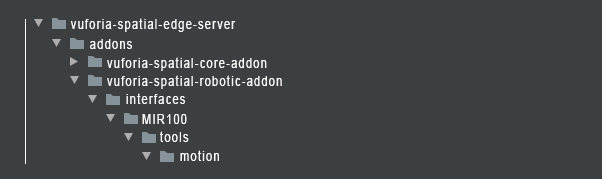
Each robotic addon contains the code needed to connect to each robot and a folder with tools. The tools folder has default UI interfaces for different applications. The main tool contained in our MIR100 addon is the motion tool. The motion tool allows for motion control and path planning of the robot.
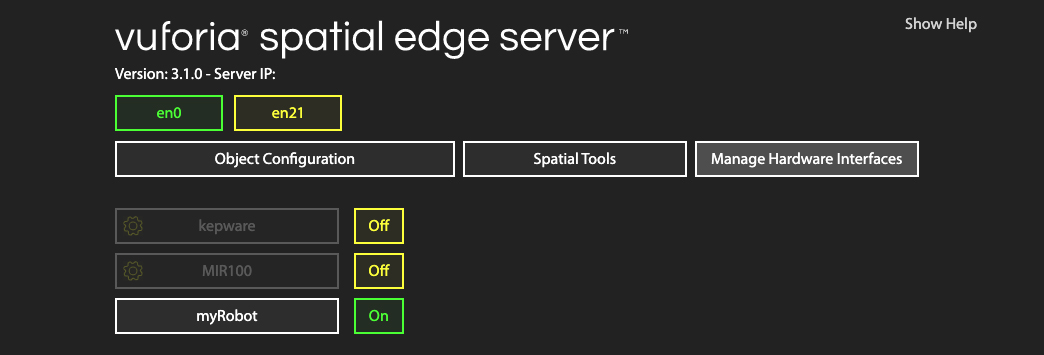
This is the base structure of the VST server with our MIR100 robotic addon:
You can create more robotic addons and more default tools for each one of them.
Use the MIR100 robotic addon
If you want to use our existing MIR100 robotic addon, follow the instructions on the MIR100 KineticAR tutorial.
Develop new robotic addon
Prerequisites
The robot you want to use needs a remote connection and you need to understand the communication protocols involved to:
- Get the robot status (current position/rotation and if it is moving or not)
- Send a move command to the robot in order to send it to a final position and rotation
- Steer the robot in realtime [optional]
You will also need the Vuforia object target or image target to identify the robot with the mobile device [Later explained]
Get Started
In case you want to develop your own addon for your specific robot, follow the next steps:
-
Download or clone the vuforia-spatial-edge-server code and place it in your development folder on your computer.
-
Download or clone the vuforia-spatial-robotic-addon code and place it in the following folder:
vuforia-spatial-edge-server/addons/
This folder contains all the code you need for your VST hardware interface.
Installing Node.js
In order to run the server, you will need Node.js installed on your computer.
Install node.js.
Open a terminal window and navigate to your vuforia-spatial-edge-server folder.
Run the following:
npm install
This will install all the Node.js dependencies needed in your VST Server.
Now do the same for your robotic addon. On your terminal navigate to vuforia-spatial-edge-server/addons/vuforia-spatial-robotic-addon and run:
npm install
This will install all the Node.js dependencies needed in the robotic addons folder.
Creating your robot addon
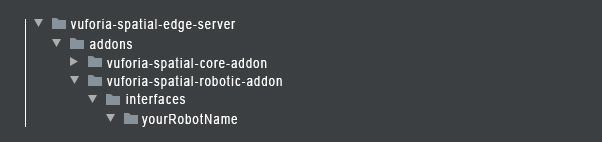
Create a new folder with your robot name. Respect the folder structure.
The minimum your robot addon needs is an index.js. Create the file and add it to your robot addon folder.
Your index.js file should start with these two variables:
var server = require('@libraries/hardwareInterfaces');
var settings = server.loadHardwareInterface(__dirname);
The server variable will allow you to interface with your VST server.
The settings variable lets you use external paramaters to configure your hardware interface.
Now get the enabled variable in order to be able to activate and deactivate the code on your interface from the VST server’s web frontend:
exports.enabled = settings('enabled');

if (exports.enabled){

    // Code executed when your robotic addon is enabled

}
At this point, lets check if your robot interface is being detected by the VST server. Open the terminal, go to your server folder and run the server by typing:
node server
Open a browser and type:
localhost:8080
This will open the VST server frontend interface. Go to Manage Hardware Interfaces.
On the left menu you will see a list with some default interfaces. You should see your new robot interface disabled in the list. You can enable or disable your robot addon by clicking ON or OFF next to it.
Basic Server Methods
In order to connect your robotic addon to the server and to your tools, you will need to use some basic methods. The following methods are the most important ones in order to develop your robotic addon.
loadHardwareInterface
Loads the hardware interface and gets the settings from the configuration file.
var settings = server.loadHardwareInterface(__dirname);
addEventListener
You can add event listeners that will get triggered when certain things happen on the server. For example, you can add an event listener for when the server finishes initializing:
server.addEventListener("initialize", function () {
    console.log('VST Server has been initialized.');
    if (exports.enabled) startHardwareInterface();
});
Other events are: “shutdown”, “reset”, etc.
enableDeveloperUI
Set the developer UI true or false
server.enableDeveloperUI(true);
setTool
The Vuforia Spatial Toolbox works with a pocket of tools to manipulate in AR. These tools are, effectively, the AR user interfaces for different logic behaviors. When working with a robot, if we want to have an AR user interface for our robot, we will need one or more tools for it.
You can access the Tool Tutorial, and familiarize yourself better with tools.
There can be infinite types of tools, and your robot may need to use a specific one that you create. The setTool method allows you to specify a default tool that your robot addon will have and be able to use when needed.
server.setTool(objectName, 'objectToolName', 'defaultToolName', __dirname);
This will automatically copy your default tool, from your robotic addon tools folder, to your objectToolName folder in your spatialToolbox folder.
addNode
The Vuforia Spatial Toolbox tools make use of nodes in order to be programmed. This nodes can connect to eachother and are used to generate logic and behavior for the different tools and interfaces. To learn more about nodes, visit our Node Tutorial.
server.addNode(objectName, toolName, nodeName, nodeType);
This method will add a node to the toolName tool.
moveNode
Change position, rotation or scale of node in AR.
server.modeNode(objectName, frameName, nodeName, x, y, scale, matrix, loyalty);
addReadListener
This method allows you to add a listener to the programming node. Every time the node changes value, the callback is triggered. You can, for example, create a node for your robot and connect a virtual button to it in order to turn it on.
server.addReadListener(objectName, frameName, nodeName, callBack);
Authors
See also the list of contributors who participated in this project.
License
This project is licensed under the MPL 2.0 License - see the LICENSE file for details
Acknowledgments
- Hat tip to anyone whose code was used
- We thank Robb Stark for being on our wall watching all of us during the development process