IMPORTANT NOTE: Due to the current situation regarding COVID-19, we don’t have access to the MIR100 AGV and have not been able to test the last tweaks to the interface. We have worked hard to ensure the correct functionality of the robotic addons but would much appreciate your patience if any bugs are found.
Using the Motion Tool
Using the Vuforia Spatial Toolbox (VST), we have designed a sample motion tool that allows for path planning for a robotic addon. The motion tool is able to track surfaces and create paths of checkpoints for a robot to follow in AR.
In this tutorial we will explain how the motion tool works and how to develop with it.
Get Started
We provide our sample robotic addon for the MIR100 robot. To setup the MIR100 robotic addon with the motion tool refer to our KineticAR tutorial. Once you have your robotic addon working with the motion tool, you will see a structure for your VST server similar to this one:
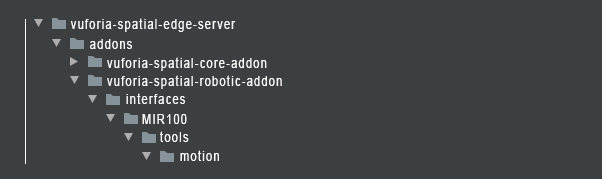
You can modify the code in the MIR100 robotic addon in order to connect to your own robot.
Dive deeper
This readme file will explain how the interface for the Motion Tool works in the VST application. If you want to dive deeper into the tool code, check out this tutorial on Developing with the Motion tool.
How it works
The motion tool is an AR interface that will allow you to visually create paths for your robot or visualize realtime motion.
Once you have your addon setup, go to your root folder (vuforia-spatial-edge-server/) and you can run the server as follows:
node server.js
Open the VST application on your mobile device.
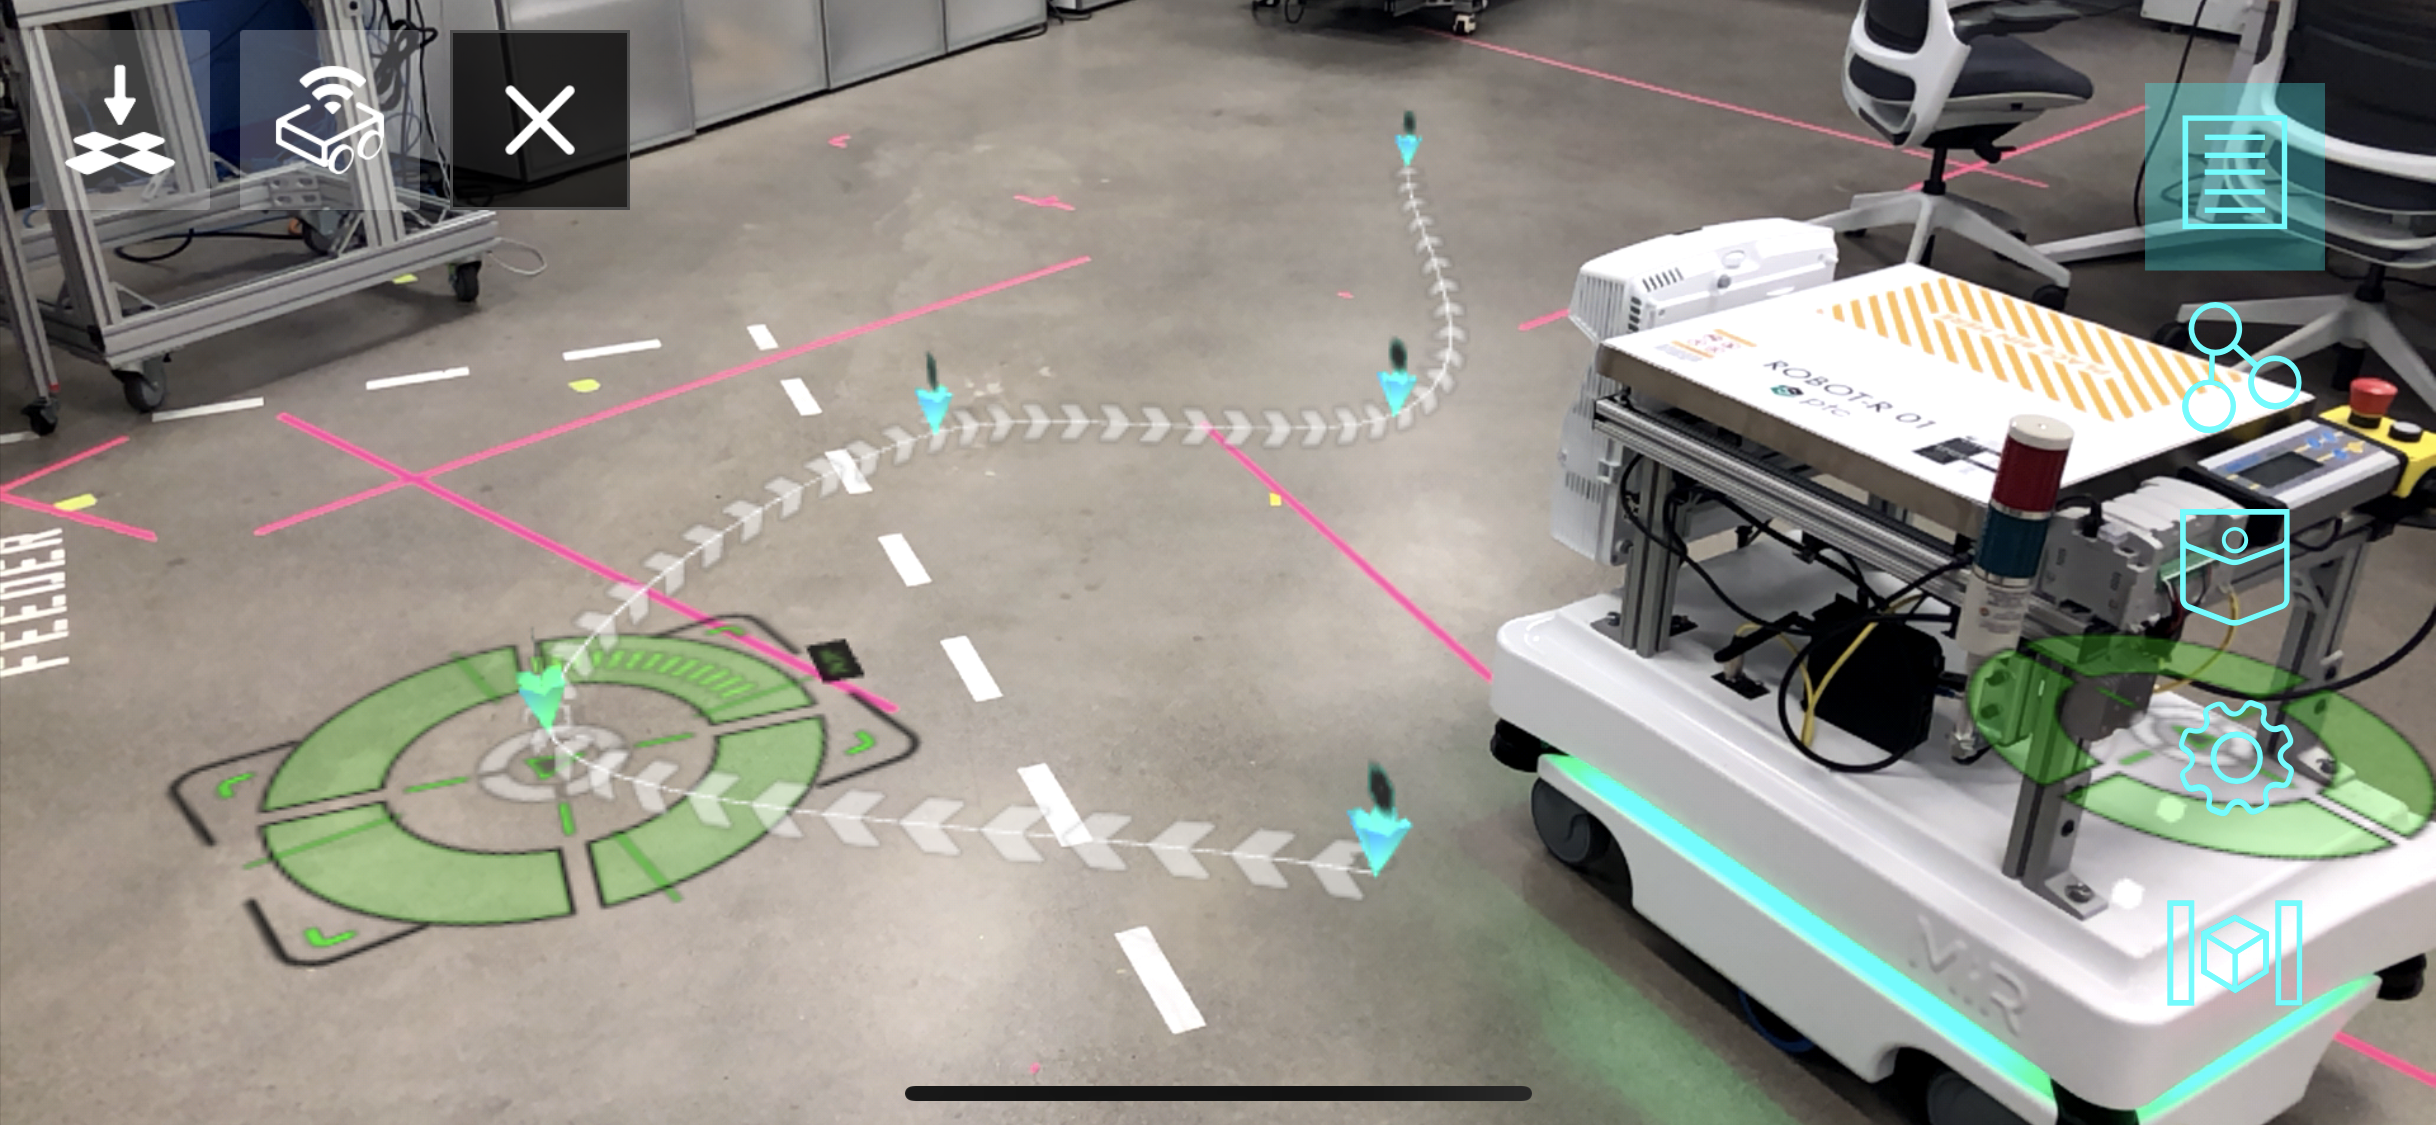
The first thing you need to do is look at the floor surface. The app will scan the floor and register the Ground Plane in the first seconds of running.
After some seconds, look at your robot object or image target. Once the robot is tracked, the motion tool interface will show up:
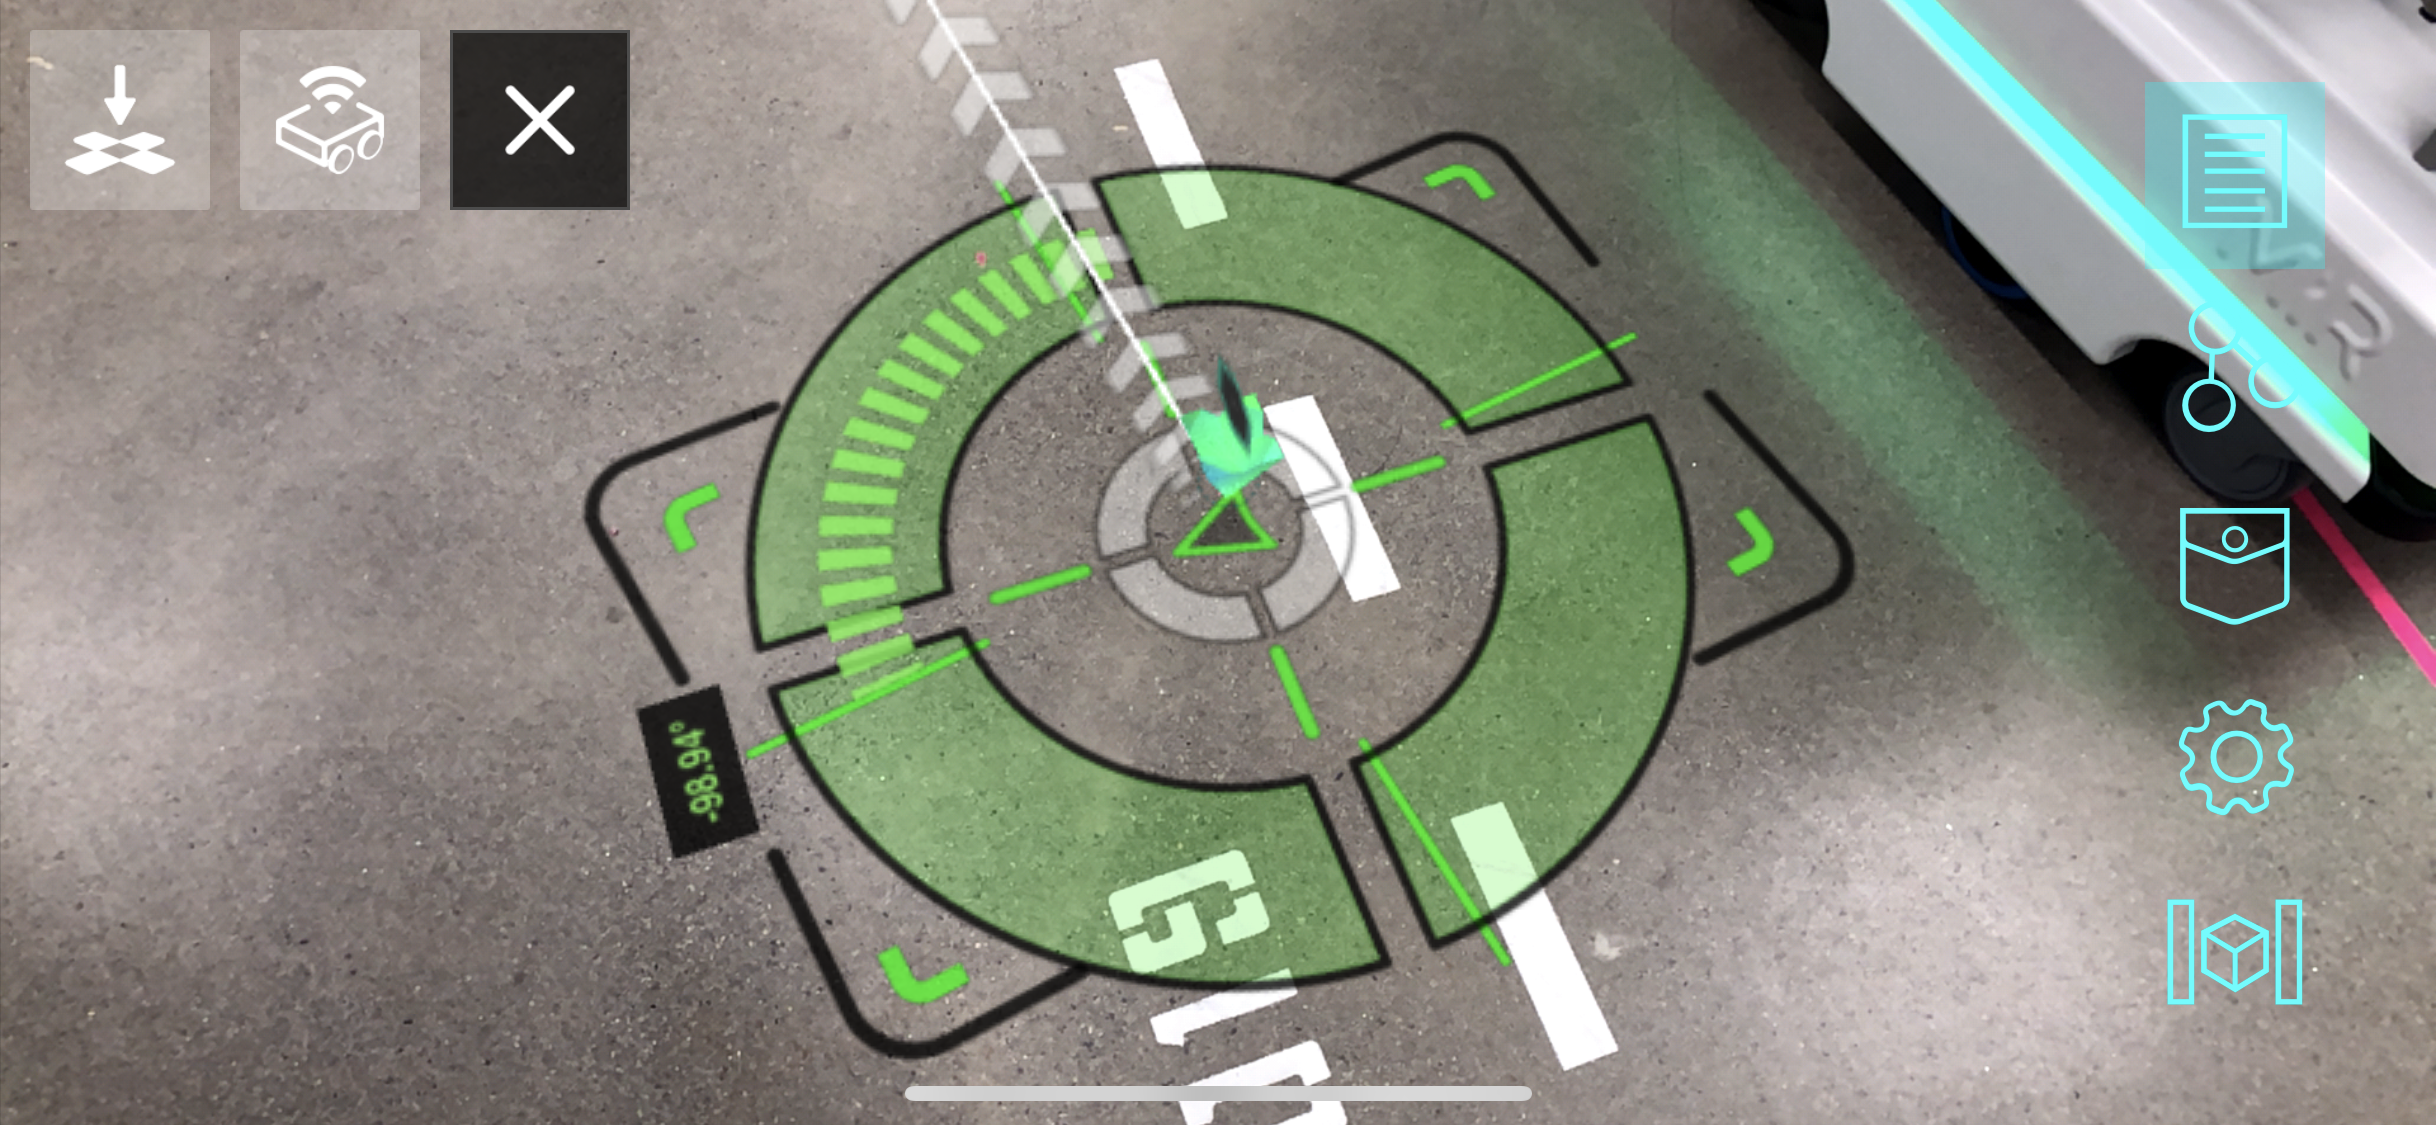
The two icons on the top left side give feedback on:
- the Ground Plane tracking
- the robot tracking.
The two buttons on the bottom left side are for
- resetting the robot tracking
- deleting all paths
Spatial Synchronization
One of the motion tool goals is to synchronize coordinate systems from the robot and the Ground Plane tracking from the mobile phone. The MIR100 has two laser scanner that generate a map of the environment. We can synchronize this map with our Ground Plane tracking so that the robot moves to locations specified in AR.
The motion tool has been coded specifically for the MIR100 but you can adapt it to other robotic systems.
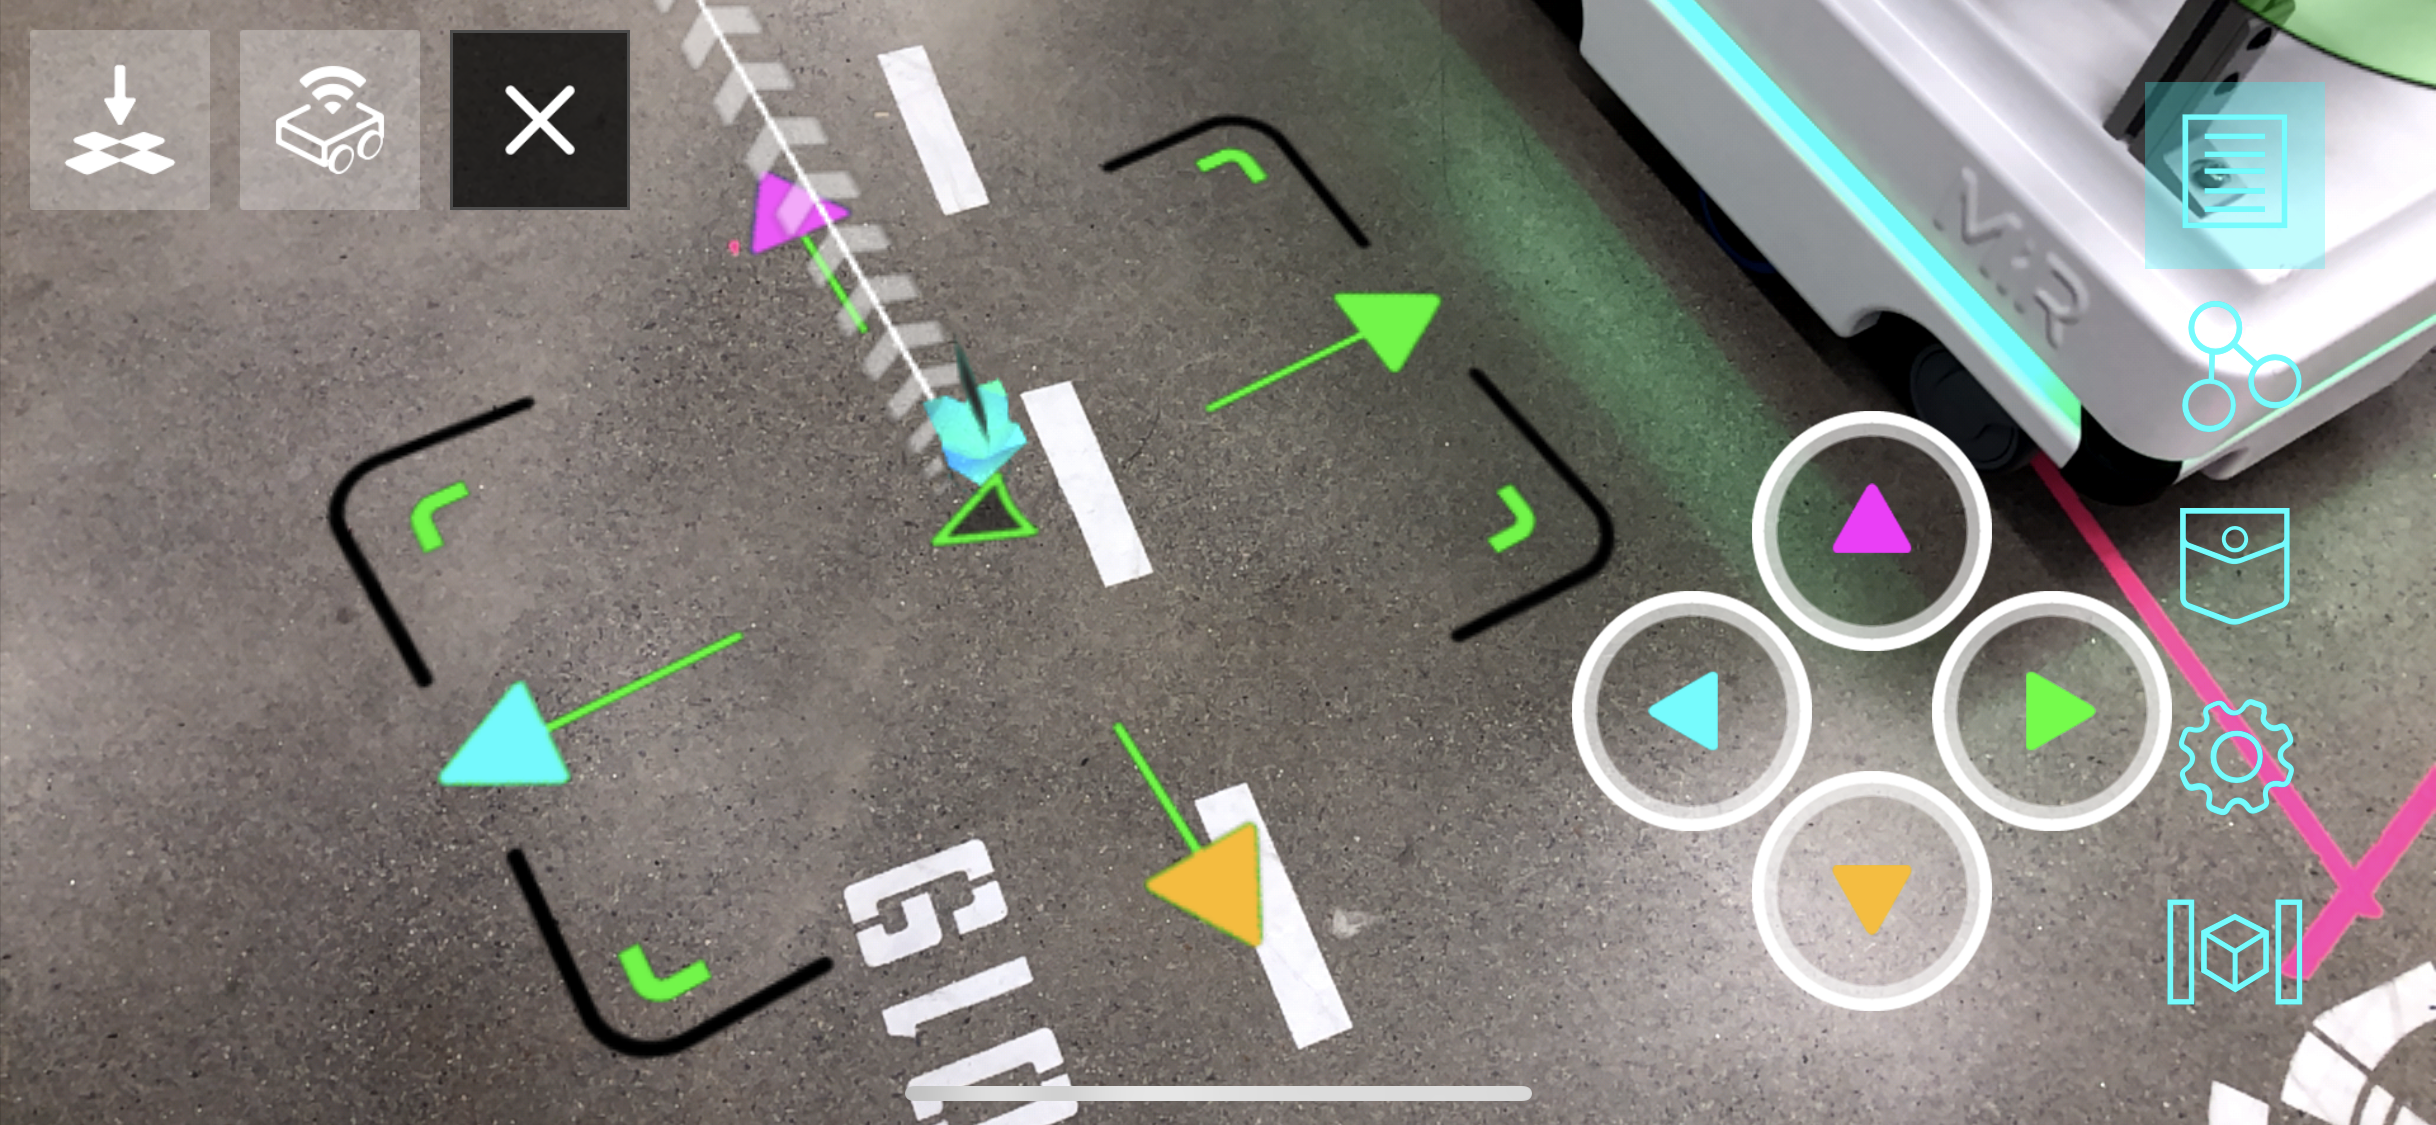
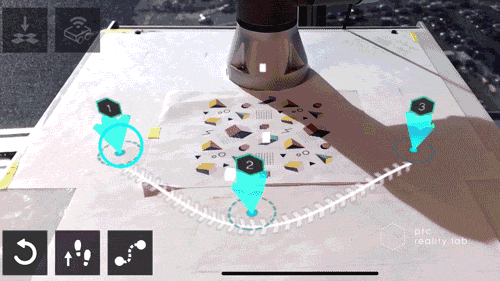
Create a path
You can create a path composed of different checkpoints in different locations.
In order to add a new checkpoint, point to the floor with your mobile device and tap with your finger in the location you want your new checkpoint. As you tap in different spots on the floor, you will see how checkpoints appear on the ground and an arrow path is formed between them.
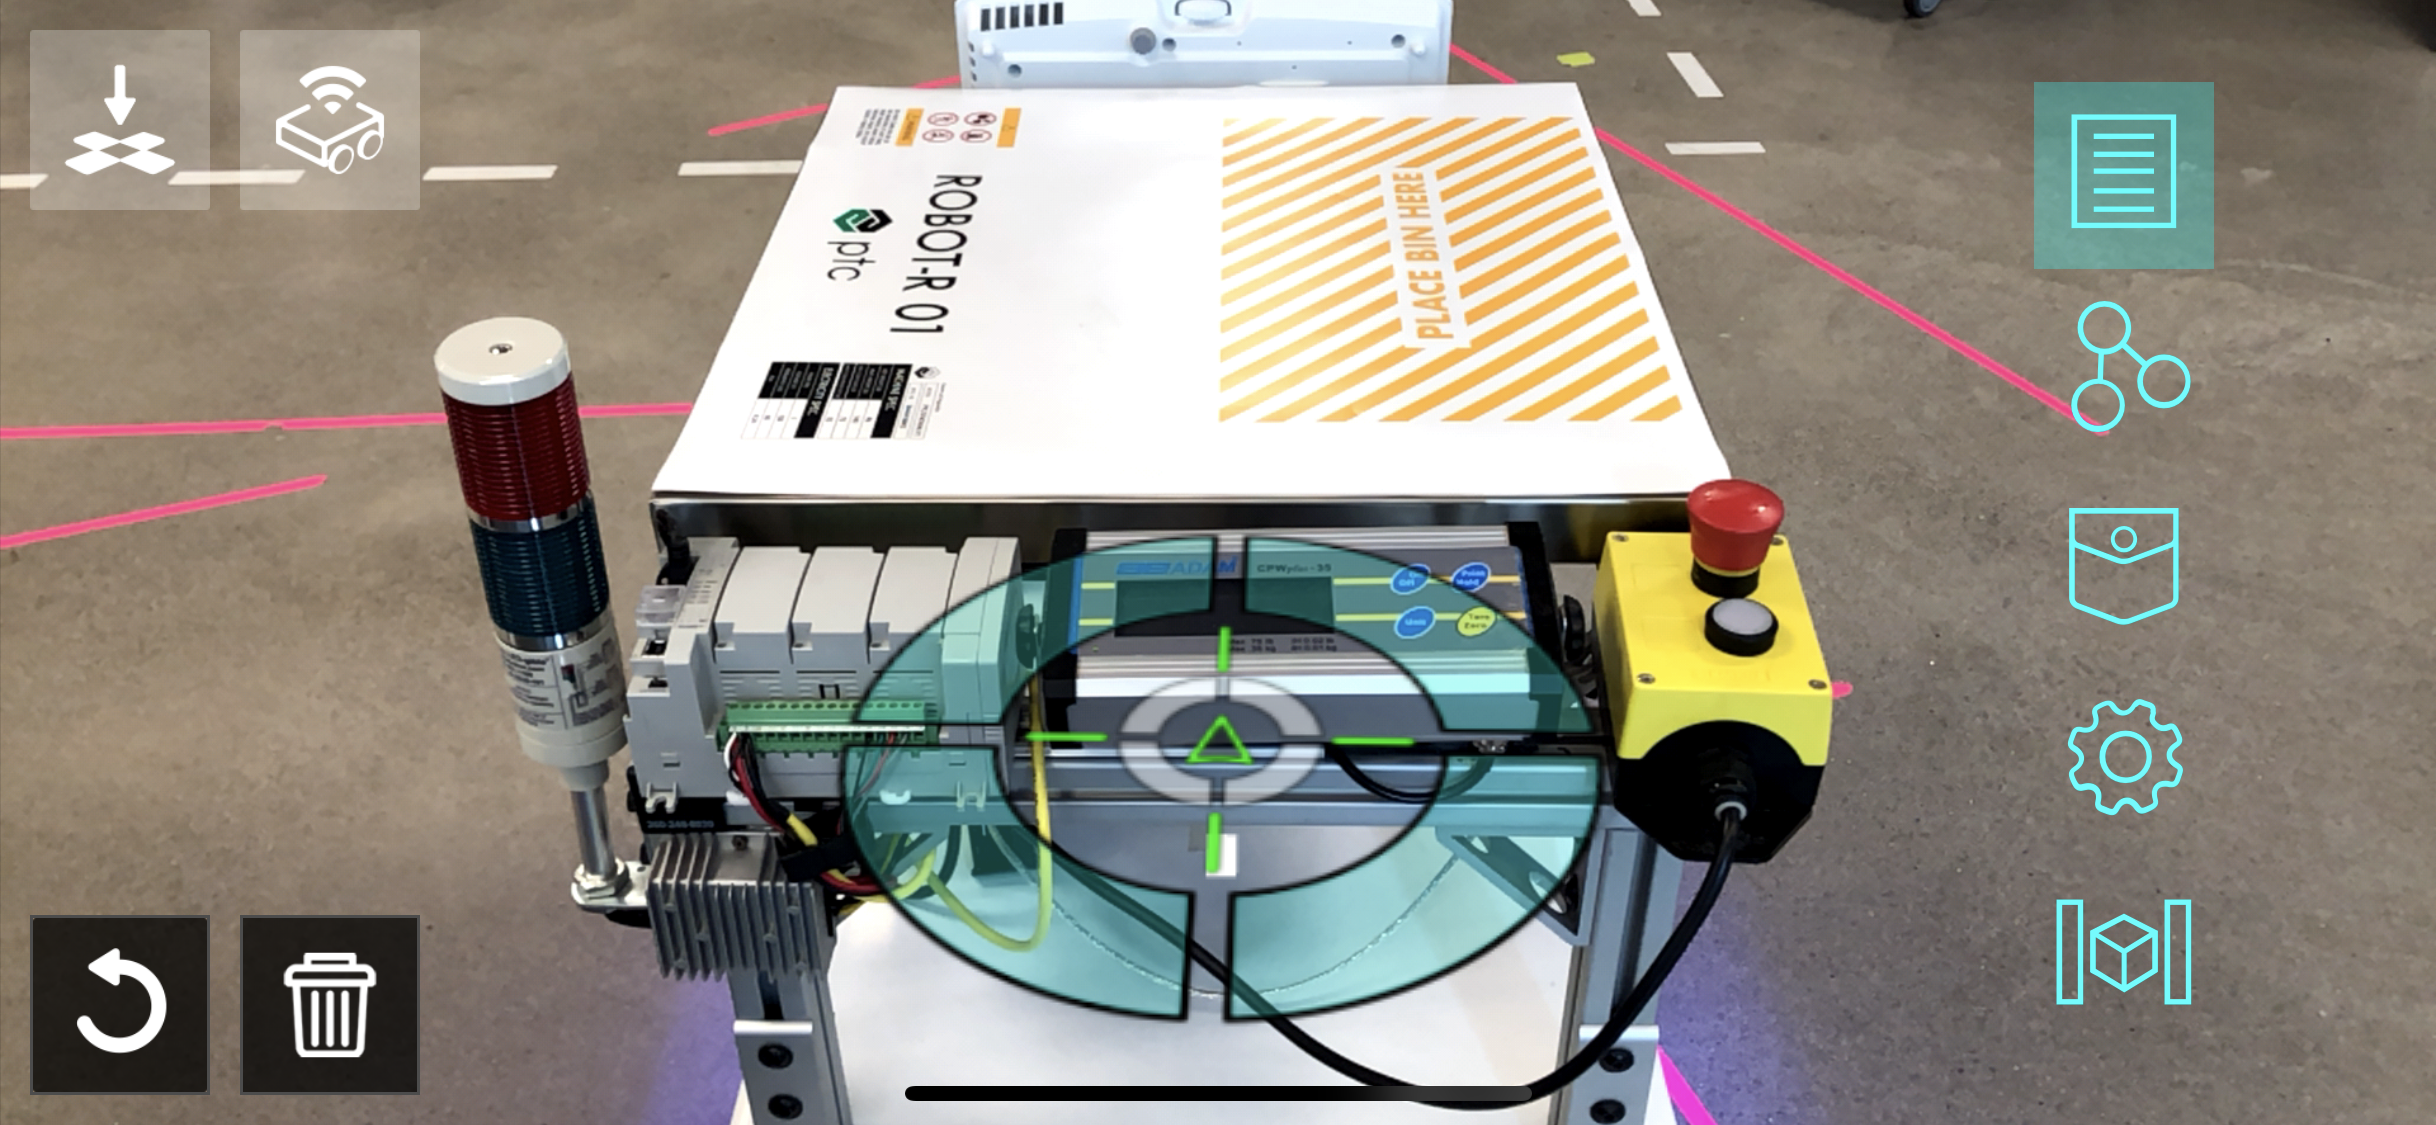
Checkpoint parameters
Each checkpoint has different parameters that can be modified: position, rotation, speed and height.
The position of each checkpoint can be quickly modified by directly dragging them around with your finger.
In order to access the parameters edition menu, hold your finger on one of the checkpoints.
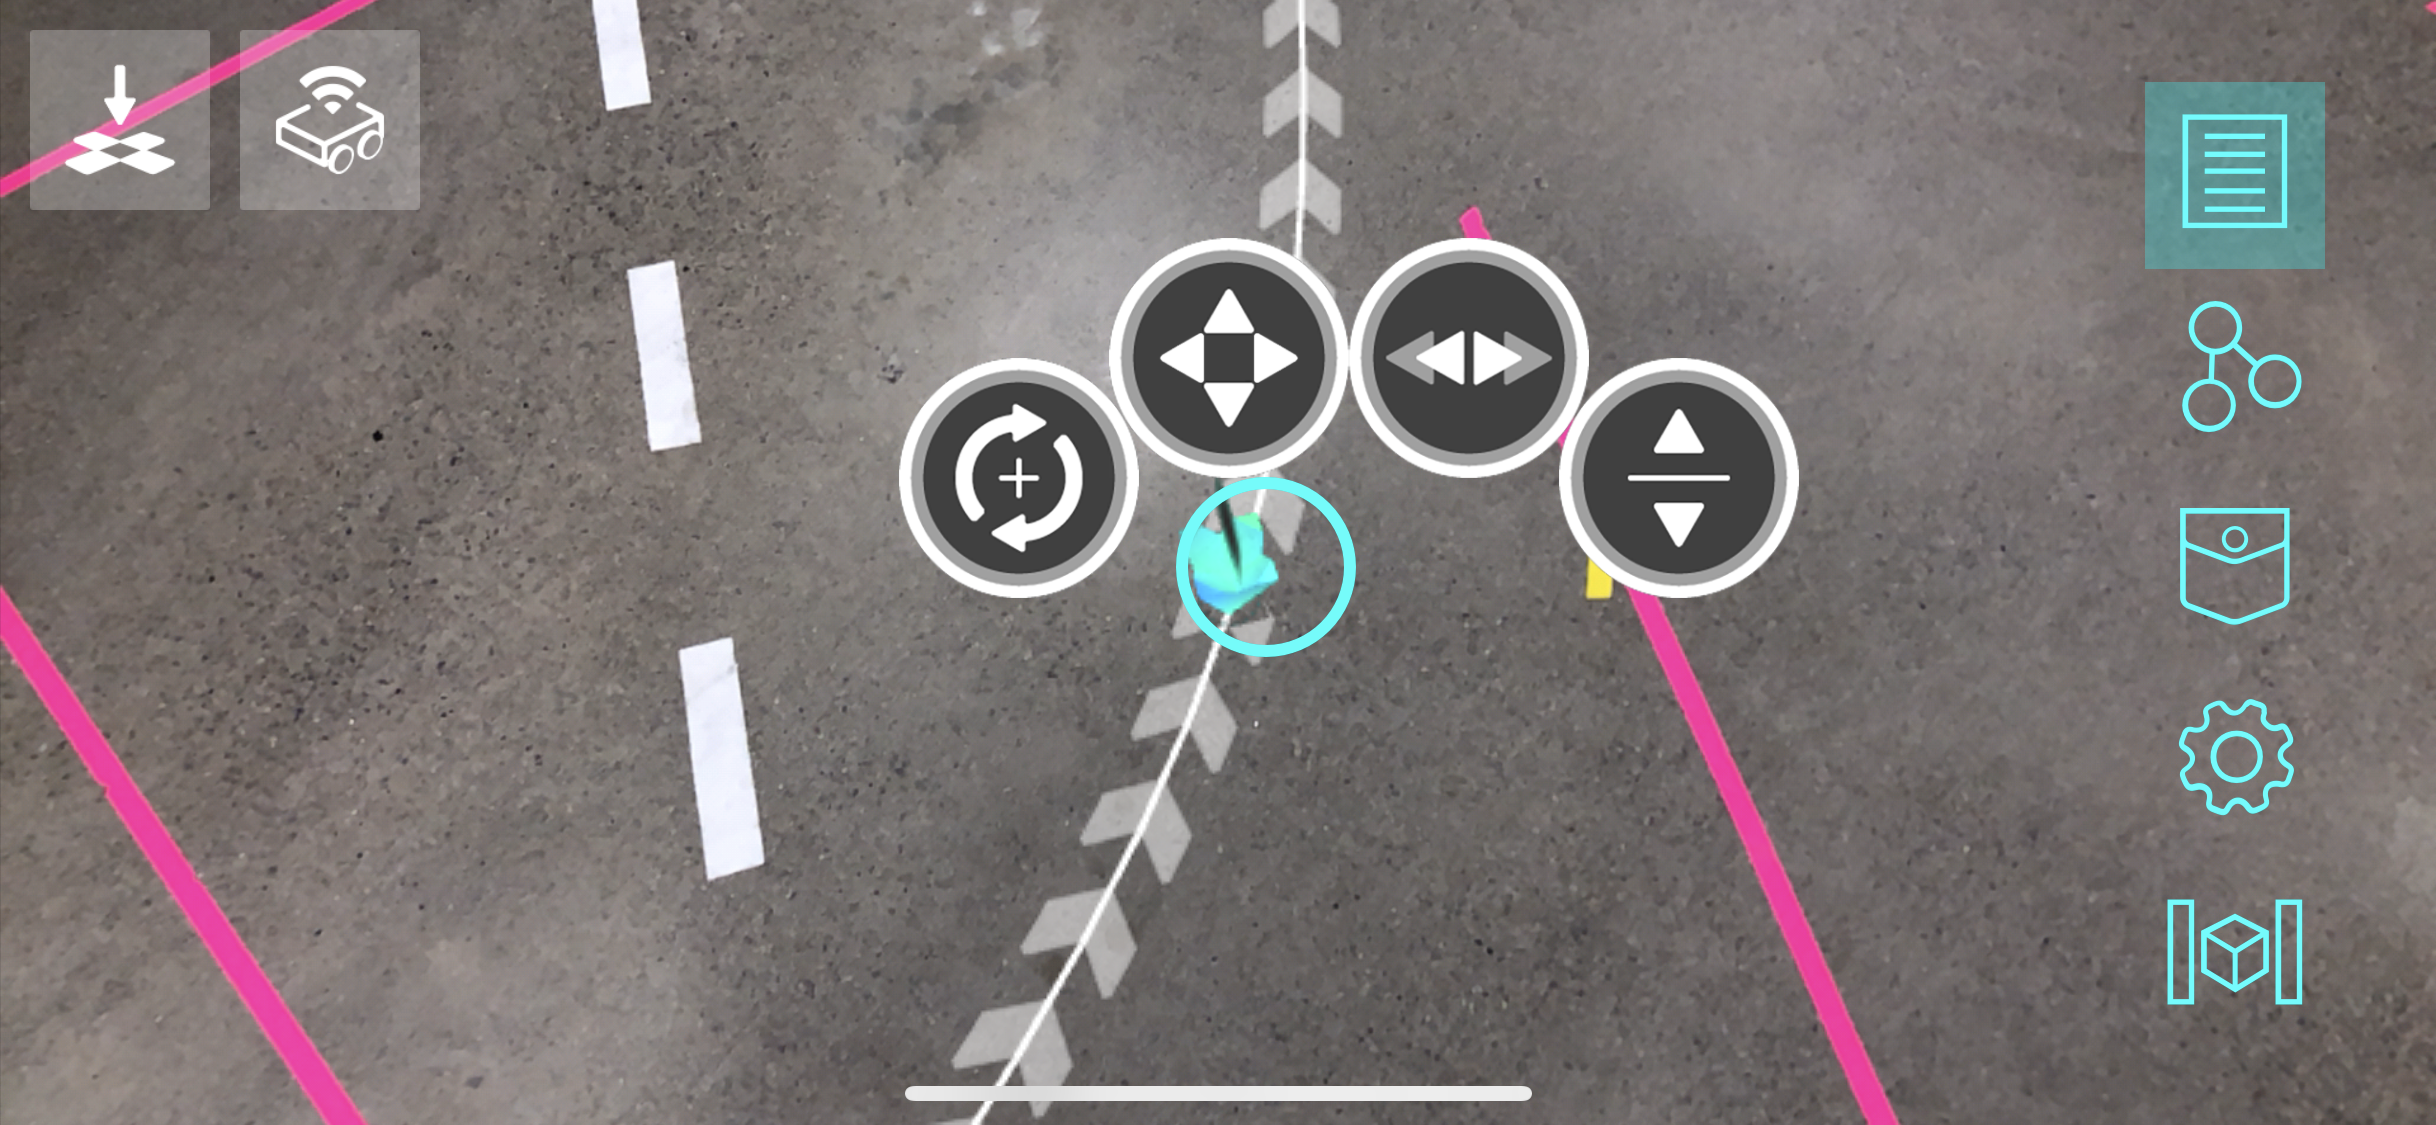
A menu with four options will appear around your finger:
- Rotation: You can modify the landing rotation of your robot at this checkpoint by adjusting the footprint ghost of the robot.
- Accurate Position: You can adjust the position more accurately with buttons that allow you to move the checkpoint by units.
-
Speed: You can change the speed paramater by dragging your finger up and down. The width of the path will be thinner when the robot has a higher speed.
-
Height: This interface has been developed to work with robots that can move in 2D or 3D. The height parameter will allow you to specify a third dimension for an end effector.
Perform robotic motion
In order to make your robot follow the path, you have to activate the first checkpoint. To do that, you can use a virtual button from the VST pocket and connect this button to the first checkpoint node. By activating this button, the first checkpoint will activate.
When a checkpoint activates (meaning that it has received a value of 1), the robot gets triggered in order to reach that checkpoint position. Once the robot has reached that position, the next checkpoint in the path (if there is one), will get activated, and this will continue until the last checkpoint is reached.
Authors
See also the list of contributors who participated in this project.
License
This project is licensed under the MPL 2.0 License - see the LICENSE file for details
Acknowledgments
- Hat tip to anyone whose code was used
- We thank Robb Stark for being on our wall watching all of us during the development process